|
|
|
This is written for Paint Shop
Pro 7, I'm sure you can get similar results in older versions and in
Photoshop.
This is the first tutorial that I have written...please give me feedback so that
I can improve my tut writing skills. Thanks.
1. Open up the base that you want to use in
PSP7.
2. If it is a .gif, increase the colors to 16 million.
3. Promote the doll to a layer. Deleted any
background left.
4. Increase the canvas size so it's big
enough to work with.
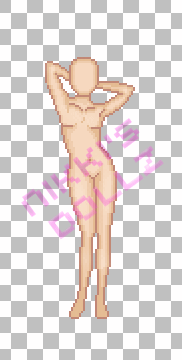
5. It should look like example 1 - I'm using a base by
xandorra. |

Example 1 |
| |
|
6. Pick the colors you want to use.
Here the range of colors I'm going to use for the skirt:

7. Add a layer for the skirt and start drawing the outline of it.
8. When drawing the outline, use the paint brush. Size 1, Opacity, Hardness and
density all at 100.
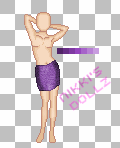
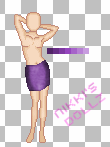
9. As you can see in example 2, I just drew the skirt really quickly. In
example 3, I went back and cleaned up the pixels. Make sure everything is only
1 pixel wide. |

Example 2 |

Example 3 |
| |
|
10. Fill in the skirt with a
lighter shade than the outline.
11. We want to start shading the skirt. First I used the Retouch tool, select
Darken RGB.
The settings should be (you can play around to get different effects :
-
Size: 6
-
Opacity: 35
-
Hardness: 0
-
Density: 100
12. Now, run your cursor around the
sides of the skirt.
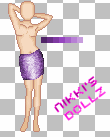
13. Let's do the highlights, choose Lighten RGB and your setting should be the
same as the Darken RGB. And highlight the middle of the skirt. You skirt
should look like example 4. |
| |

Example 4 |
| |
|
14. Let's add some noise to the
skirt to give it more texture. Go to Effects, Noise and then Add. Do about 20%
noise and make sure Uniform is chosen. Then go to Colors, then colorize and
choose the hue you are using. I'm using hue 189 and saturation of 89. |

Example 5
|
| |
|
15. Select your skirt, the easiest
ways is to use the selector tool and draw a rectangle around it then double
click in the center of it.
16. Go to Effects, Blur and then Gaussian Blur.
17. Do about .5 to .7. Now the image is going to be a little transparent around
the edges now.
18. Click CTRL+C to copy it and then do CRTL+E to paste it in to the selection.
19. Line up the two images. |

Example 6
|
| |
|
20. I want the skirt a little
lighter. Go to Colors, Adjust, and then Brightness/Contrast. I choose 20 for
Brightness & Contrast.
21. To give the skirt more texture, repeat steps 11 to 19.
22. I didn't like how dark my sides were so I used the Lighten RGB to lighten
them. The more times you repeat the steps 11-19 the more texture the skirt will
have. |
| |
|

Example 7
|
| |
|
23. You could stop here if you
wanted to, but clothes usually have some natural folds when you move.
24. Get the Darken RGB, change the size to 1 and the opacity to about 45. and
draw the shadow creases in the fabric. Should look like example 8.
25. Draw the highlights with the Lighten RGB, size 1 and the opacity about 18.
When the shadow and highlights are done, it should look like example 9. |
| |
|

Example 8

Example 9
|
| |
|
If you want to you could add a belt or put a
slit in the skirt. If you put a slit, be sure to use the Darken RGB on the new
edges. Also I softened the creases with the Retouch tool, using soften with an
opacity of about 20. |
| |
|
 |
| |